Cron jobs are usually used to schedule commands at a specific time. You can use them for tasks like running backups, monitoring the status of the system, or running system maintenance tasks.
Cron jobs are a helpful utility for system administrators. And when you are administering a system in the cloud, cron jobs are still very useful – you still have to do a lot of administrative tasks on your systems.
One way of running cron jobs in the cloud is to use a function as a service (FaaS), like Lambda in the AWS ecosystem.
Functions execute when they are triggered to do so, and they run code in the cloud without the need to provision or maintain any infrastructure. Also functions can be configured to run at a certain time or with certain periodicity, like traditional cron jobs.
In this blog post, I will use the AWS ecosystem to show you a concrete example on how to create a cron job using a function in the cloud.
Amazon CloudWatch events
In order to use a Lambda function as a cron job, we need to understand Amazon CloudWatch events.
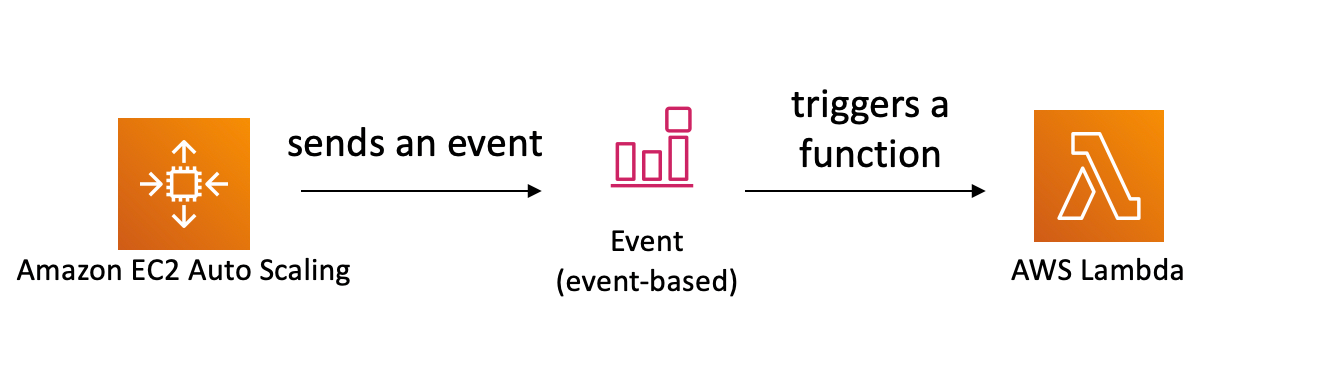
Amazon CloudWatch events are sent when there are changes in the AWS resources. These events can trigger an AWS Lambda function. When your AWS resources change state, they automatically send CloudWatch events to the event stream.
Therefore, you can create a rule that triggers a specific Lambda function when something happens. For example, you can automatically invoke a Lambda function when there is a change in an AutoScaling group.
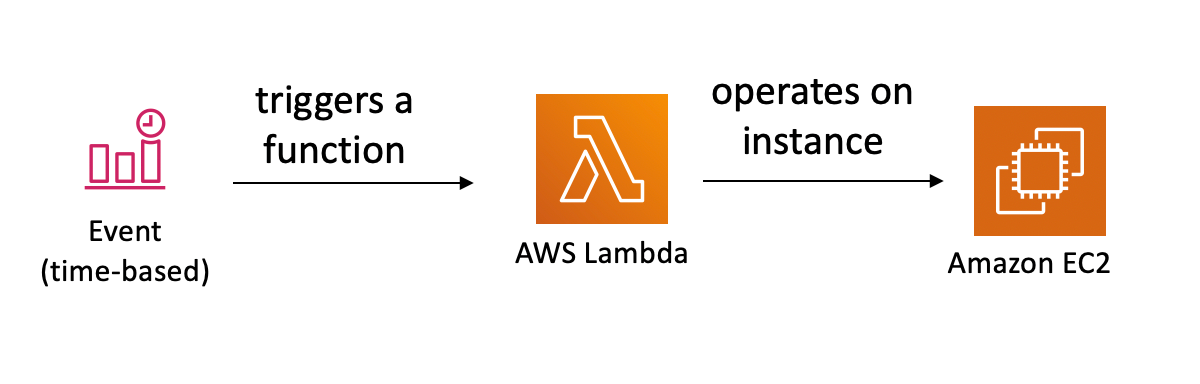
In addition, CloudWatch events can invoke a Lambda function to execute on a regular schedule. And in this way you can have, for example, a Lambda function that turns off all your testing and development EC2 instances after 6pm and another one that turns them on after 8am.
Setting up the demo
I want to show you an example of a Lambda function that can perform actions on your EC2 instances. I will be using AWS SAM to define my Lambda function as infrastructure as code.
If you want to try this demo out, you need to have an AWS account and one or more EC2 instances configured in your AWS account. These are the ones that we are going to manipulate from the Lambda functions. EC2 instances are the AWS version of virtual machines in the cloud.
You can try the demo on AWS Cloud9 IDE (a browser based IDE), as AWS SAM is already configured in that IDE. If you want to know how to use AWS Cloud9 IDE to operate Lambda functions you can check out this video.
In this example, we are going to start and stop EC2 instances using two different AWS Lambdas that get triggered at a given time. We are starting the instances at 8am everyday and turning them off at 6pm when the day is over.
For that we are going to use a CloudWatch event to trigger the Lambda at the right time and also the AWS SDK to perform the operations in the instances.
The finalised code for this example is available in this GitHub repository. To get this code working in AWS Cloud9 IDE, you need to configure your GitHub account in the IDE to be able to clone the project and then clone it inside the IDE.
When you have that ready, just run this command inside the cloned directory:
$ sam deploy --guidedWhen running that command you will get a set of questions that you need to answer in order to configure this project to run successfully.
The first thing you need to define is a name for your project. Then you'll set the region where it is getting deployed - pick the same where your EC2 instances are. Next we need to give the deploy script a list of the instances that we want to manipulate. And then we are done – it will deploy the project to our AWS account.
Defining the AWS Lambda function
The first thing I want to show you is how we define a AWS Lambda function that gets triggered in a specific time using AWS SAM. This definition will be in the file called "template.yml".
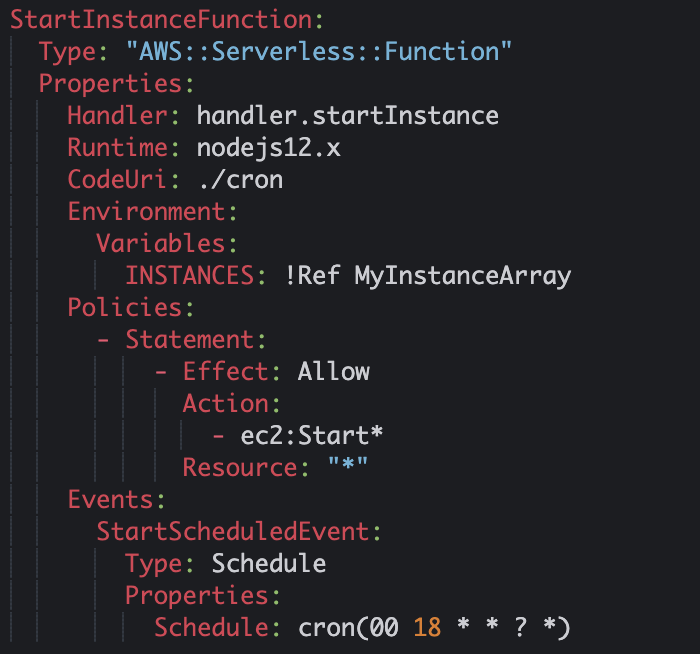
This is how a function looks. Let's look at the important lines:
The first line is the name of the function, in this case “StartInstanceFunction”.
Then we have the “Properties” definition. The first property is the “Handler”. Here we will specify the module (file) where the code that needs to execute is and then the method inside that module.
And then we have the “CodeUri”, which is the path that shows you where to find that file. In this case, our code will be inside a directory called “cron” in a file called “handler.js” and in a method called “startInstance”.
After that we have the “Runtime” definition. I will be using NodeJS version 12, but you can use Python, Java, Go, C#, or whatever makes you happy. Lambda supports multiple runtimes out of the box and you can bring your own runtime if you want to.
Then we have the “Environment” definition that we will use to define the one environmental variable. This variable will allow us to send to the code dynamically different instances ids, depending on the configuration when we deploy.
After that we have a section called “Policies” which is where we define the permissions that this particular Lambda function will have.
It is important to know that all Lambda functions are created without any permissions. That means that they cannot do anything on any other AWS resources.
In order for this Lambda function to start an EC2 instance, it needs permissions to do that particular action on that particular AWS resource. In this particular policy we are granting permissions to start ALL EC2 instances in this AWS account. ALL is represented with the “*” in the resources section.
If you have this piece of code running in production, I recommend that you limit the resources to exactly the ones that you want this Lambda to be able to start.
And finally, the last section is the “Events” section. Here we will define how this Lambda function will get triggered. This function will get triggered with a scheduled CloudWatch event that triggers the Lambda everyday at 8 in the morning. Basically at 8 every day it will turn on all the EC2 instances that you specify.
There are many rules to form this cron expression: for example, to say that you would like this to run only Monday through Friday, write cron(0 8 ? * MON-FRI *). You can find more info in the documentation site of CloudWatch events here: https://docs.aws.amazon.com/lambda/latest/dg/services-cloudwatchevents-expressions.html.
Coding the AWS Lambda function
Now that we have defined the Lambda function we need to provide some code to it. In the folder “cron”, in the file “handler.js”, we need to add the method called “startInstance” that looks like this:
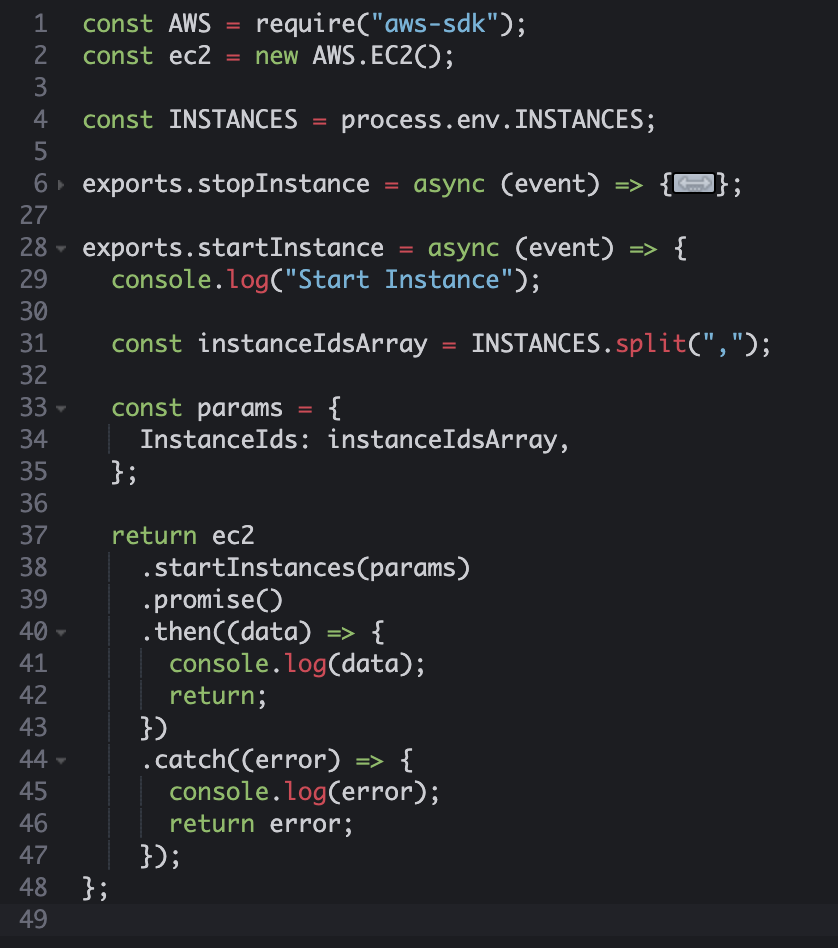
This method will get called when the function is triggered every day at 8 am. It will get the list of EC2 instances from an environmental variable that we passed all the instances ids during deployment time. Then it will create an array of them.
When it has that, it will call the AWS SDK and send the array of instances id as a parameter. And if there is any error it will log it and complete. Immediately after this Lambda finishes execution, you can go to your EC2 console and see how your instances turn on.
The function to turn off the EC2 instances is very similar with a few differences. You can find the code for that function in this link and check it out.
Running the cron job
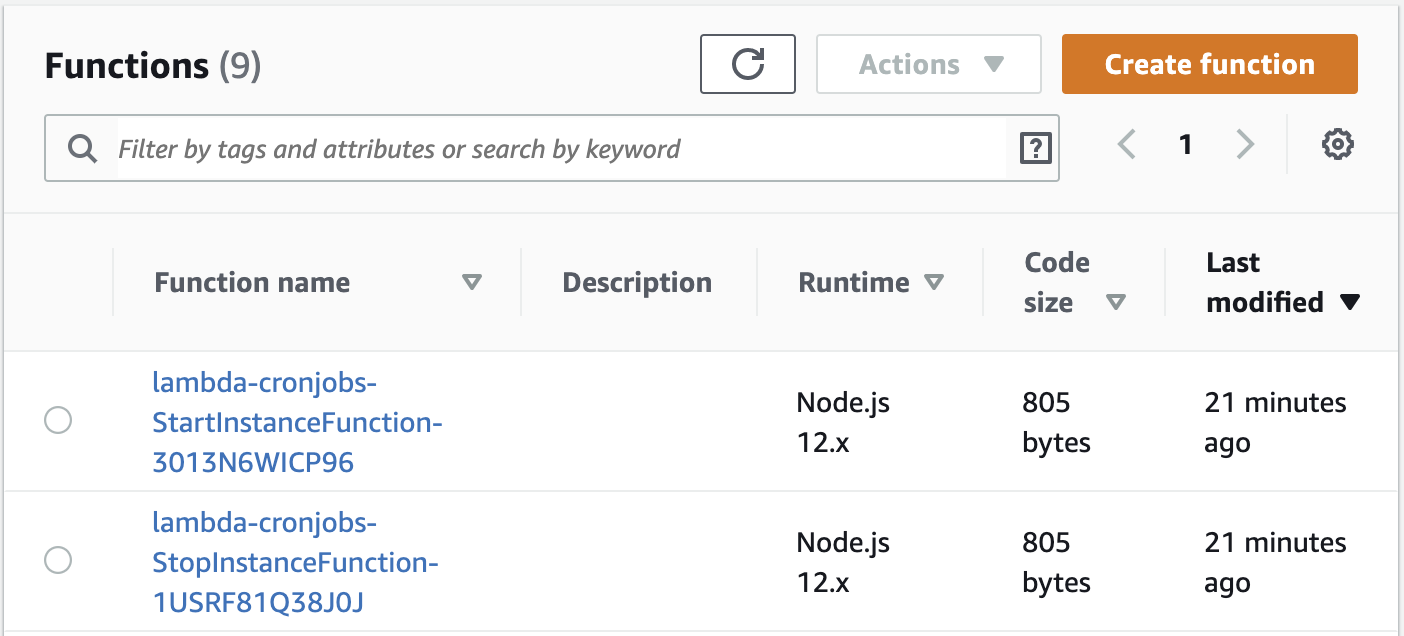
To run this cron job, there is not much left to do. After the two functions are deployed in your AWS account, in the same region as your instances, they will execute and do what they were programmed to do.
Now you need to wait until 8am or 6pm to see if they work. Or if you want to test it out right now, change the event time in the Lambda definition to a time that works for you. Make sure that the instance is on if you are planning to turn them off or the other way around, so you can see the changes.
Now wait and see what happens in the EC2 console. Right after the time you set up, you will see the instance go off or on and then do the opposite at the other time you setup. This will go forever until you remove the Lambda functions.
Cleaning up your AWS account
After completing this demo I recommend you that you turn off (or remove the instance you created to test) and remove the Lambda functions you just created.
Removing the lambda functions is as easy as going into your CloudFormation service in your AWS management console and removing the stack of resources that AWS SAM created.
Also don’t forget to terminate and remove the EC2 instances if you created them for this demo.
To conclude
AWS Lambda functions are a very useful tool to perform all kinds of tasks in your AWS account. You can basically get notifications of any changes in the AWS resources through CloudWatch events and then you can access almost all the services using the AWS SDK. So you can perform all kinds of maintenance tasks and automated tasks over your infrastructure.
Thanks for reading.
I’m Marcia Villalba, Developer Advocate for AWS and the host of a youtube channel called FooBar where I have over 250 video tutorials on Serverless, AWS and software engineer practices.
- Twitter: https://twitter.com/mavi888uy
- Youtube: https://youtube.com/foobar_codes