AWS Compute Blog
Improving the Getting Started experience with AWS Lambda
Update – October 30, 2019: This experience is now available in the following regions: us-east-1, us-east-2, us-west-1, us-west-2, ap-northeast-1, ab-northeast-2, ap-south-1, ap-southeast-1, ap-southeast-2, ca-central-1, eu-central-1, eu-west-1, eu-west-2, eu-west-3, sa-east-1.
Original post from October 3, 2019:
A common question from developers is, “How do I get started with creating serverless applications?” Frequently, I point developers to the AWS Lambda console where they can create a new Lambda function and immediately see it working.
While you can learn the basics of a Lambda function this way, it does not encompass the full serverless experience. It does not allow you to take advantage of best practices like infrastructure as code (IaC) or continuous integration and continuous delivery (CI/CD). A full-on serverless application could include a combination of services like Amazon API Gateway, Amazon S3, and Amazon DynamoDB.
To help you start right with serverless, AWS has added a Create application experience to the Lambda console. This enables you to create serverless applications from ready-to-use sample applications, which follow these best practices:
- Use infrastructure as code (IaC) for defining application resources
- Provide a continuous integration and continuous deployment (CI/CD) pipeline for deployment
- Exemplify best practices in serverless application structure and methods
IaC
Using IaC allows you to automate deployment and management of your resources. When you define and deploy your IaC architecture, you can standardize infrastructure components across your organization. You can rebuild your applications quickly and consistently without having to perform manual actions. You can also enforce best practices such as code reviews.
When you’re building serverless applications on AWS, you can use AWS CloudFormation directly, or choose the AWS Serverless Application Model, also known as AWS SAM. AWS SAM is an open source framework for building serverless applications that makes it easier to build applications quickly. AWS SAM provides a shorthand syntax to express APIs, functions, databases, and event source mappings. Because AWS SAM is built on CloudFormation, you can specify any other AWS resources using CloudFormation syntax in the same template.
Through this new experience, AWS provides an AWS SAM template that describes the entire application. You have instant access to modify the resources and security as needed.
CI/CD
When editing a Lambda function in the console, it’s live the moment that the function is saved. This works when developing against test environments, but risks introducing untested, faulty code in production environments. That’s a stressful atmosphere for developers with the unneeded overhead of manually testing code on each change.
Developers say that they are looking for an automated process for consistently testing and deploying reliable code. What they need is a CI/CD pipeline.
CI/CD pipelines are more than just convenience, they can be critical in helping development teams to be successful. CI/CDs provide code integration, testing, multiple environment deployments, notifications, rollbacks, and more. The functionality depends on how you choose to configure it.
When you create a new application through Lambda console, you create a CI/CD pipeline to provide a framework for automated testing and deployment. The pipeline includes the following resources:
- A source code repository using AWS CodeCommit or GitHub
- A pipeline using AWS CodePipeline orchestration
- A single-stage build project using AWS CodeBuild
- A buildspec.yaml file that can include build, test, and packaging steps
Best practices
Like any other development pattern, there are best practices for serverless applications. These include testing strategies, local development, IaC, and CI/CD. When you create a Lambda function using the console, most of this is abstracted away. A common request from developers learning about serverless is for opinionated examples of best practices.
When you choose Create application, the application uses many best practices, including:
- Managing IaC architectures
- Managing deployment with a CI/CD pipeline
- Runtime-specific test examples
- Runtime-specific dependency management
- A Lambda execution role with permissions boundaries
- Application security with managed policies
Create an application
Now, lets walk through creating your first application.
- Open the Lambda console, and choose Applications, Create application.
- Choose Serverless API backend. The next page shows the architecture, services used, and development workflow of the chosen application.
- Choose Create and then configure your application settings.
- For Application name and Application description, enter values.
- For Runtime, the preview supports Node.js 10.x. Stay tuned for more runtimes.
- For Source Control Service, I chose CodeCommit for this example, but you can choose either. If you choose GitHub, you are asked to connect to your GitHub account for authorization.
- For Repository Name, feel free to use whatever you want.
- Under Permissions, check Create roles and permissions boundary.
- Choose Create.
Exploring the application
That’s it! You have just created a new serverless application from the Lambda console. It takes a few moments for all the resources to be created. Take a moment to review what you have done so far.
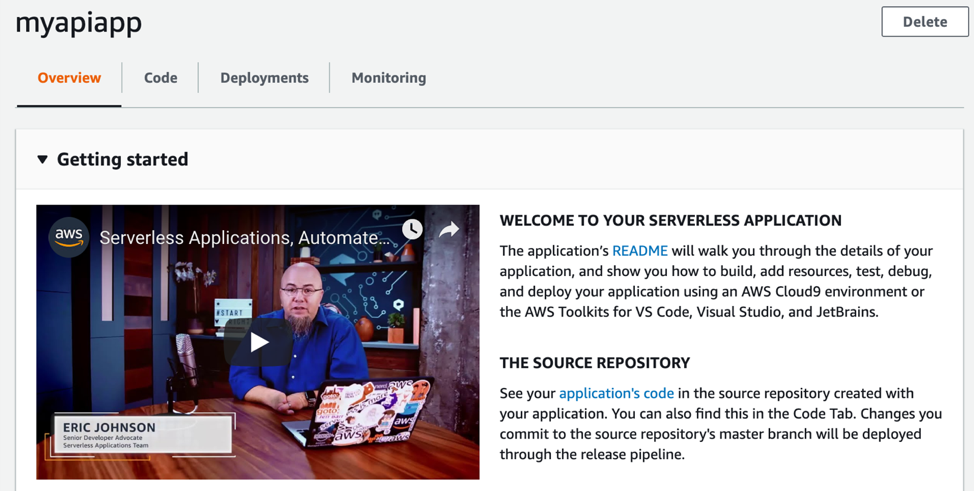
Across the top of the application, you can see four tabs, as shown in the following screenshot:
- Overview—Shows the current page, including a Getting started section, and application and toolchain resources of the application
- Code—Shows the code repository and instructions on how to connect
- Deployments—Links to the deployment pipeline and a deployment history.
- Monitoring—Reports on the application health and performance
The Resources section lists all the resources specific to the application. This application includes three Lambda functions, a DynamoDB table, and the API. The following screenshot shows the resources for this sample application.
Finally, the Infrastructure section lists all the resources for the CI/CD pipeline including the AWS Identity and Access Management (IAM) roles, the permissions boundary policy, the S3 bucket, and more. The following screenshot shows the resources for this sample application.
About Permissions Boundaries
This new Create application experience utilizes an IAM permissions boundary to help further secure the function that gets created and prevent an overly permissive function policy from being created later on. The boundary is a separate policy that acts as a maximum bound on what an IAM policy for your function can be created to have permissions for. This model allows developers to build out the security model of their application while still meeting certain requirements that are often put in place to prevent overly permissive policies and is considered a best practice. By default, the permissions boundary that is created limits the application access to just the resources that are included in the example template. In order to expand the permissions of the application, you’ll first need to extend what is defined in the permissions boundary to allow it.
A quick test
Now that you have an application up and running, try a quick test to see if it works.
- In the Lambda console, in the left navigation pane, choose Applications.
- For Applications, choose Start Right application.
- On the Endpoint details card, copy your endpoint.
- From a terminal, run the following command:
curl -d '{"id":"id1", "name":"name1"}' -H "Content-Type: application/json" -X POST <YOUR-ENDPOINT>
You can find tips like this, and other getting started hints in the README.md file of your new serverless application.
Outside of the console
With the introduction of the Create application function, there is now a closer tie between the Lambda console and local development. Before this feature, you would get started in the Lambda console or with a framework like AWS SAM. Now, you can start the project in the console and then move to local development.
You have already walked through the steps of creating an application, now pull it local and make some changes.
- In the Lambda console, in the left navigation pane, choose Applications.
- Select your application from the list and choose the Code tab.
- If you used CodeCommit, choose Connect instructions to configure your local git client. To copy the URL, choose the SSH squares icon.
- If you used GitHub, click on the SSH squares icon.
- In a terminal window, run the following command:
git clone <your repo> - Update one of the Lambda function files and save it.
- In the terminal window, commit and push the changes:
git commit -am "simple change"
git push - In the Lambda console, under Deployments, choose View in CodePipeline.

The build has started and the application is being deployed .
Caveats

This is a feature beta and as such, it is not a full representation of the final experience. We know this is limited in scope and request your feedback. Let us know your thoughts about any future enhancements you would like to see. The best way to give feedback is to use the feedback button in the console.
Conclusion
With the addition of the Create application feature, you can now start right with full serverless applications from within the Lambda console. This delivers the simplicity and ease of the console while still offering the power of an application built on best practices.
Until next time: Happy coding!