It's usually the small things that make a big difference. As I was updating my Function Core tools today (the Functions CLI) I was pleasantly surprised to notice some new functionality which was added to the tooling. The Functions team has added the capability to enforce/use HTTPS when developing and debugging in the local development using the Functions Core tools.
If you're new to Azure Functions and never used the Core tools, then you may be surprised to find that we now have 2 versions of the tools. I know, but stay with me because they currently server different needs.
The first one, v1, is the RTM version. The same one you have on Azure if you run the release (default) version of Functions. The v1 toolset is only supported on Windows because it has a dependency on the .NET framework. Although it's Windows only, it has the best support around bindings and languages.
If, however, you prefer to use a Mac or Linux and have an appetite for beta versions and experimental features, then the v2 core tools allow you to develop and run Functions everywhere (even inside a [container](GHOST_URL/running-azure-functions-anywhere-with-the-power-of-containers/" target="_blank)). It's built on top of Node.js and .NET Core so it's truly cross platform and comes with a number of improvements.
In this quick post, I'll show you how to use the v2 version of the Functions Core Tools to develop locally using HTTPS
Prerequisites
To use the v2 Azure Functions Core tools, you need to have the following 2 tools installed:
- .NET Core
- Node.js (version 8.x).
NOTE: If you install or already have Node.js v9 installed it will cause issues. Make sure you target Node 8.x.
Add HTTPS support
First, we need to install or upgrade the Core tools to the latest version. Open up the command prompt and type the following command:
npm i -g azure-functions-core-tools@core
To ensure that the tools have installed successfully, in the command prompt type func. You should be presented with the following output. The important bit is highlighted
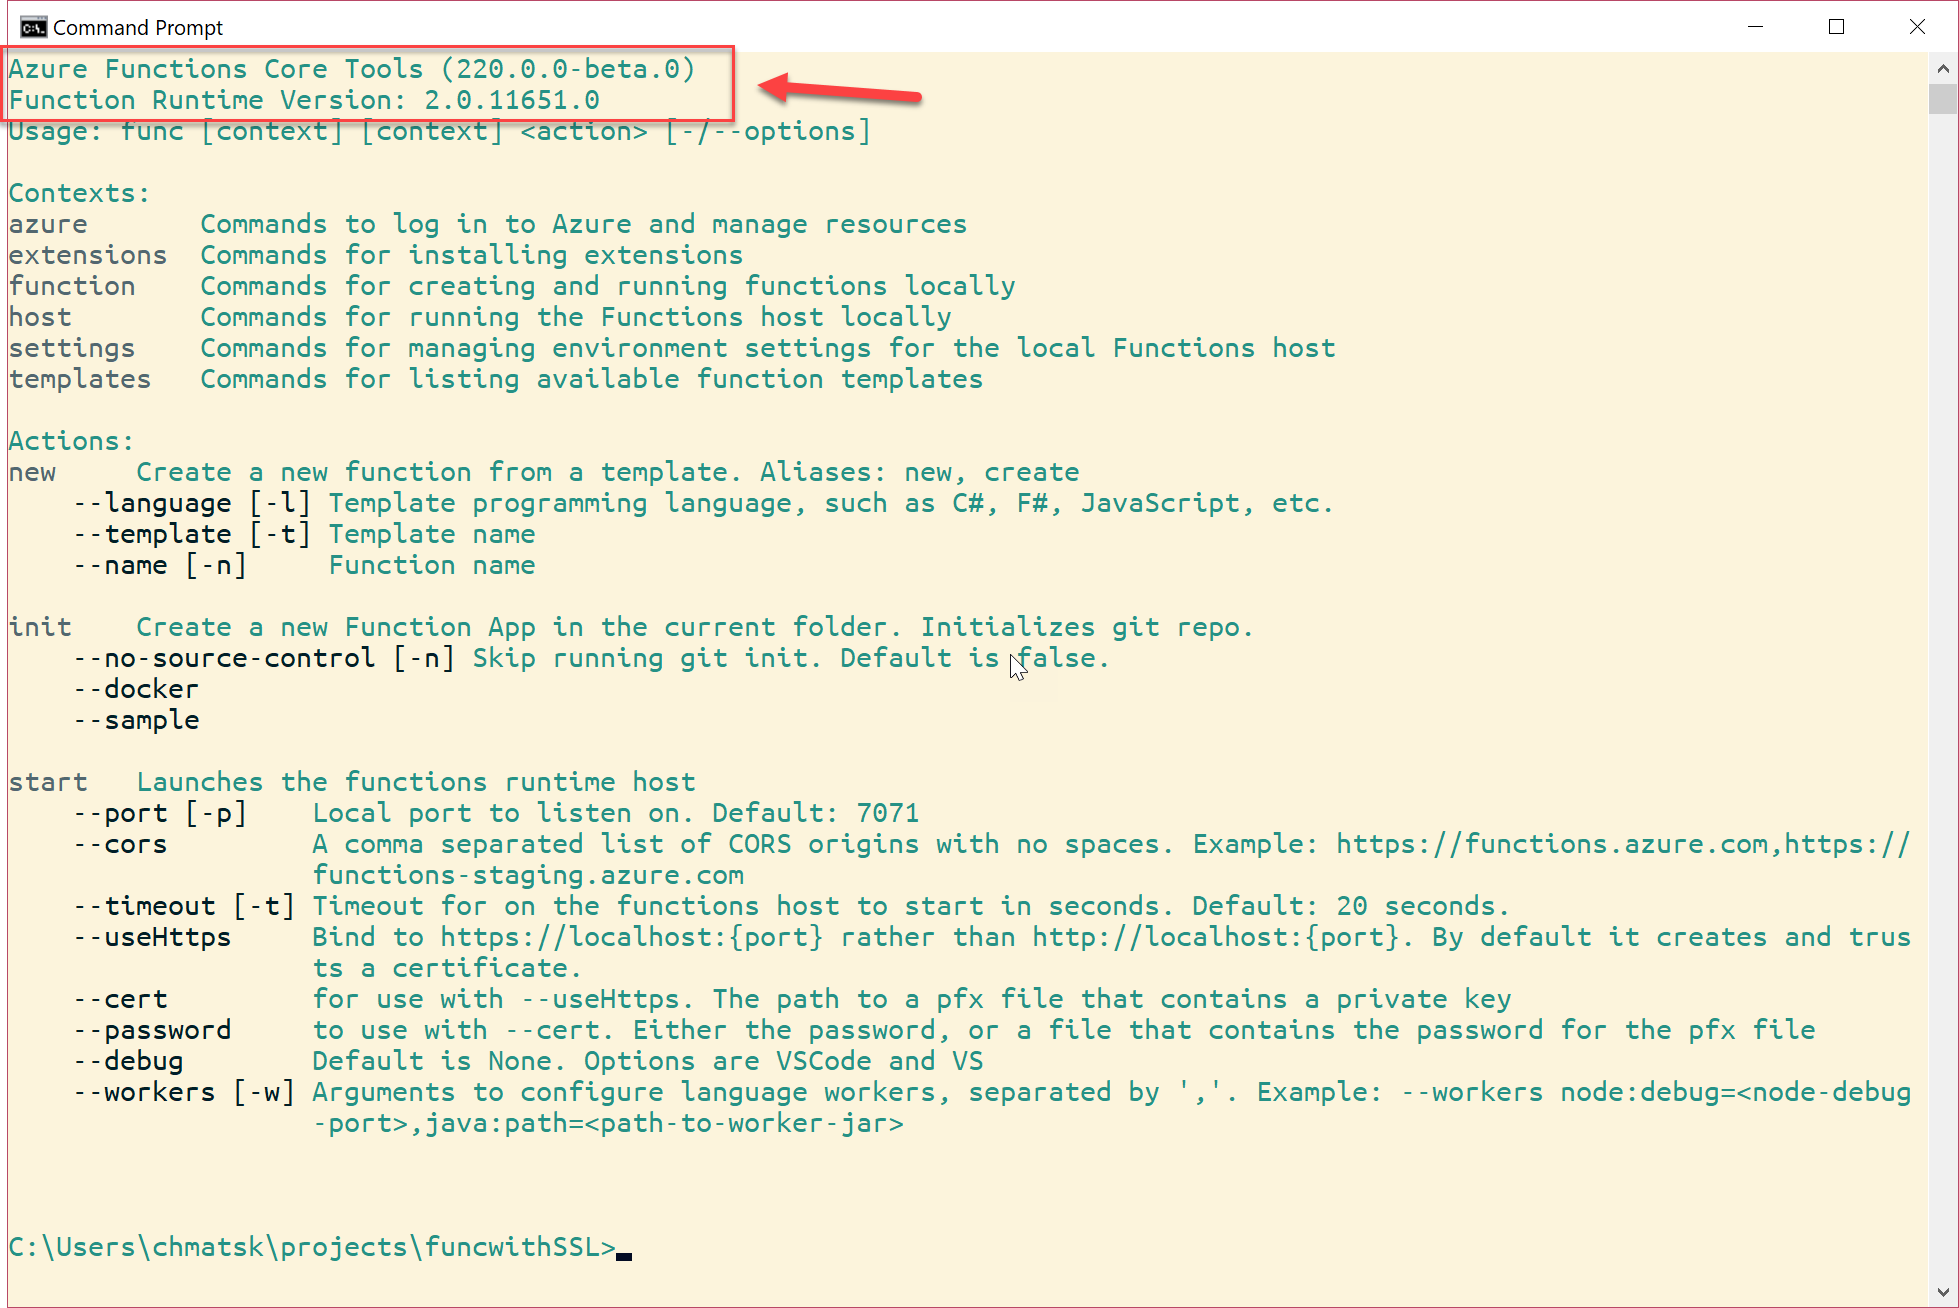
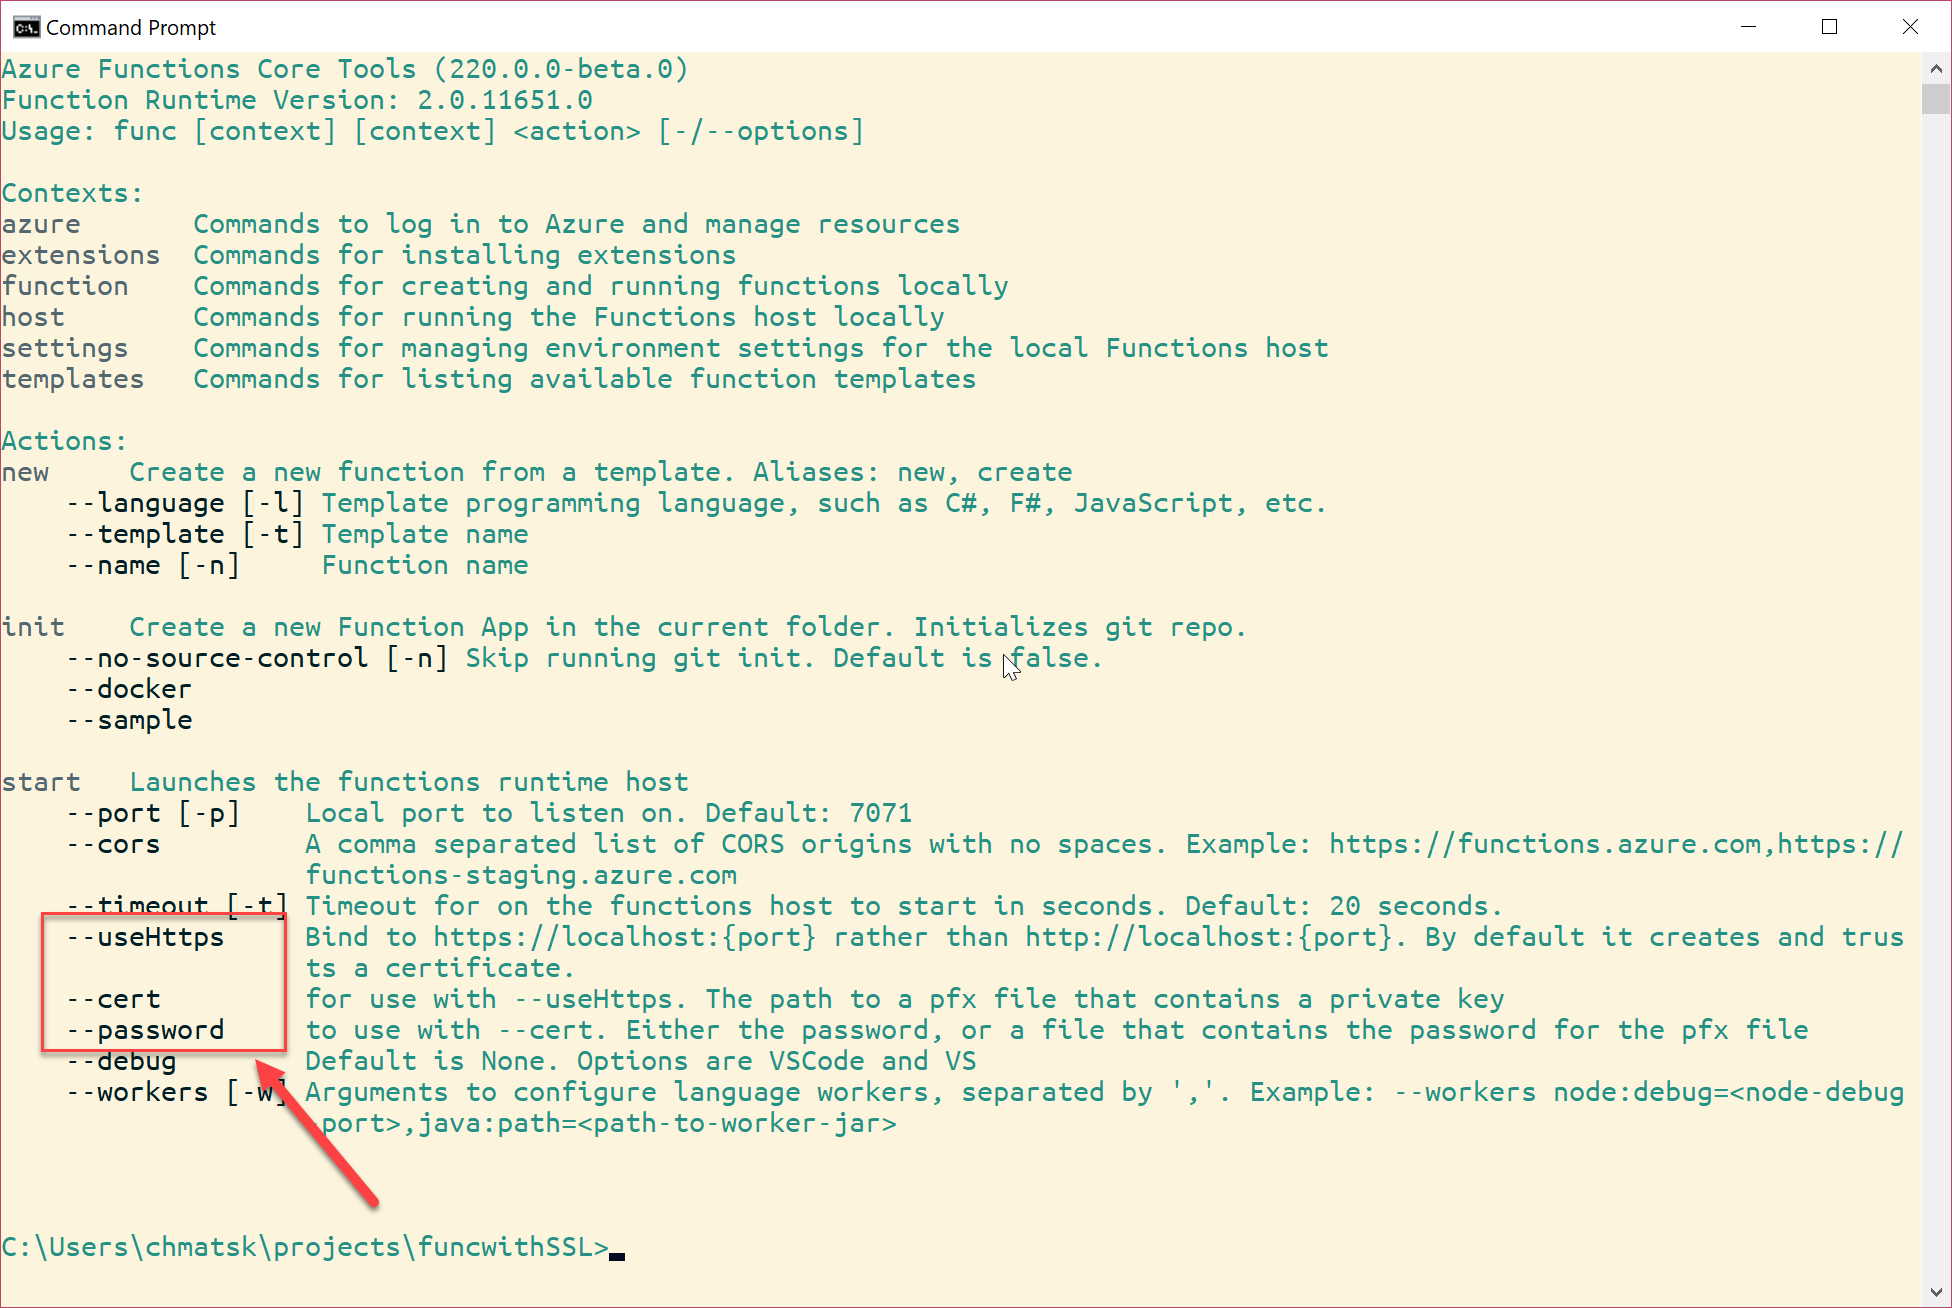
The func command also provides us with a nice "help/man" with all the available commands and options and their use. Near the bottom (highlighted) of the help, we can see the HTTPS-related options. It seems straightforward. To use an SSL in the local environment we need the following flags:
- --useHttps -> this needs to be a trusted certificate to avoid errors
- --cert -> the path to the *.pfx that we need to use for HTTPS
- --password -> the private key of the *.pfx
If you don't have a dev-only, self-signed certificate, you can find the instructions on how to do it in [this blog post](GHOST_URL/enforcing-https-only-traffic-with-asp-net-core-and-kestrel/" target=_blank). Go on, I'll wait.
With the certificate in place, we can now create a new function and test the HTTPS functionality using the following steps.
- Open the command prompt
- Create a new directory:
mkdir funcwithssl - Navigate to the new directory:
cd funcwithssl - Create the function app:
func init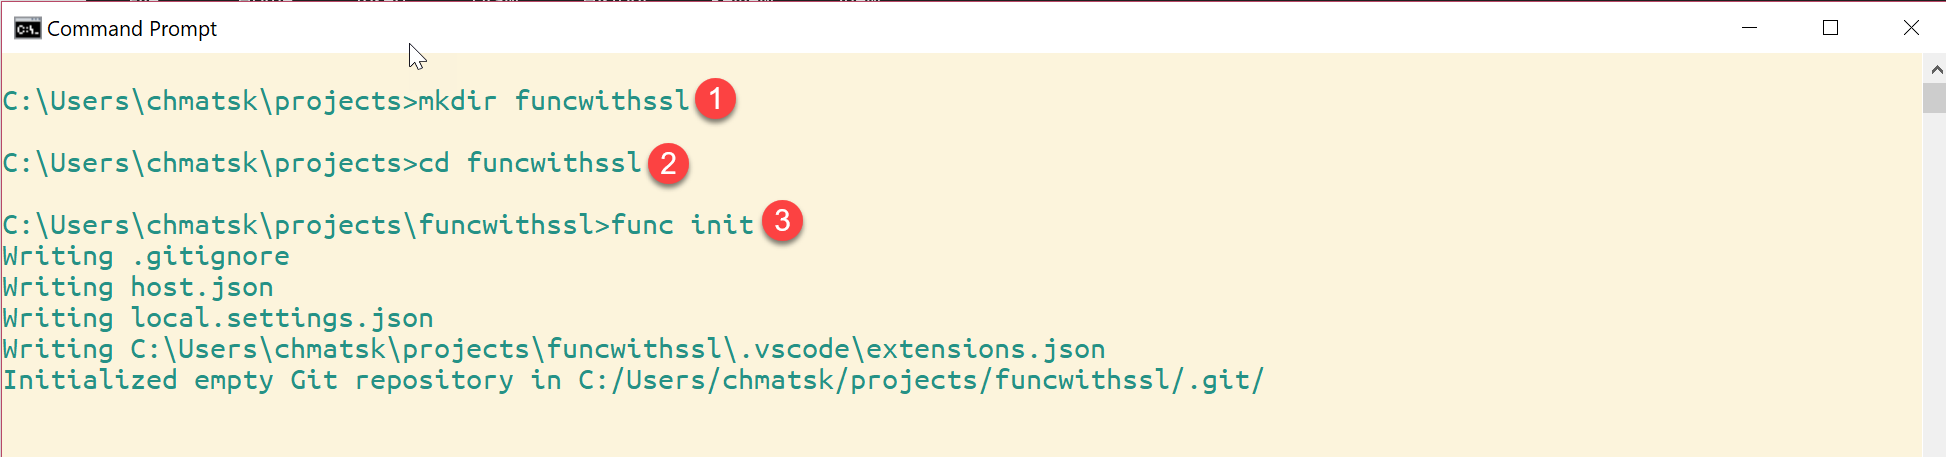
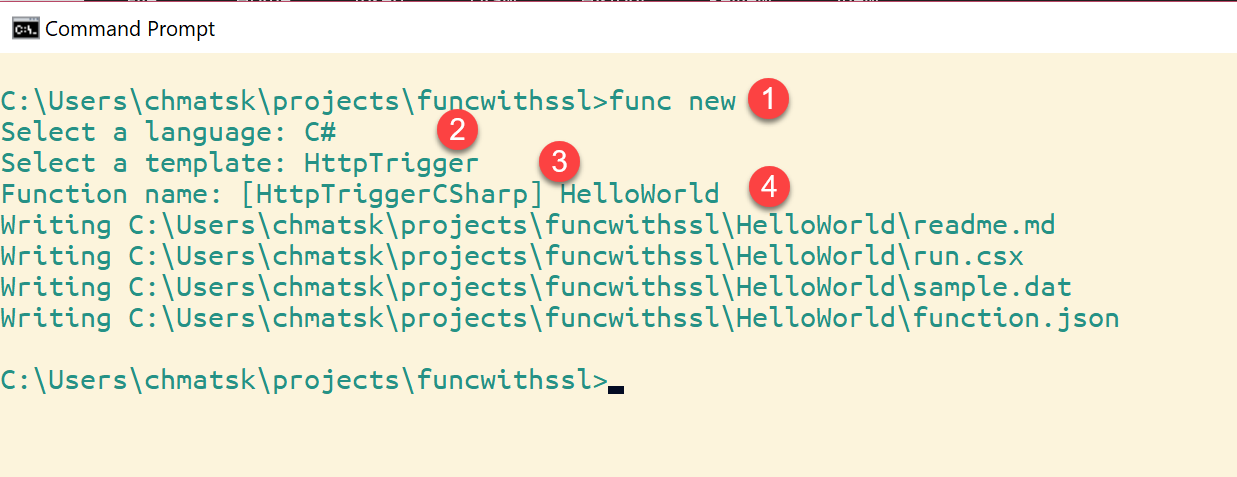
- Create the function:
func new- Select C#
- Select HTTPTrigger
- Name: HelloWorld
- Run the function:
func host start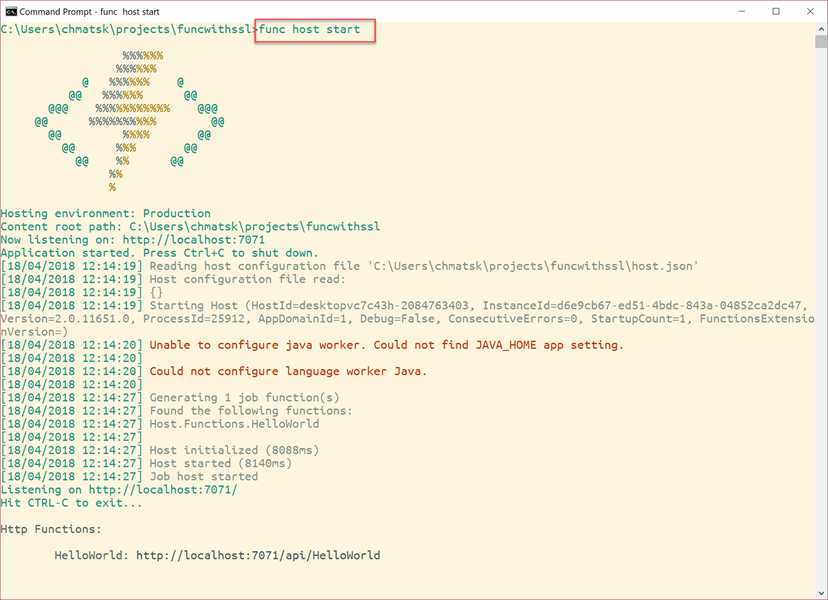
- Use your preferred tools (browser, Postman, Fiddler) to call the function passing the appropriate parameter, i.e http://localhost:7071/api/HelloWorld?name=
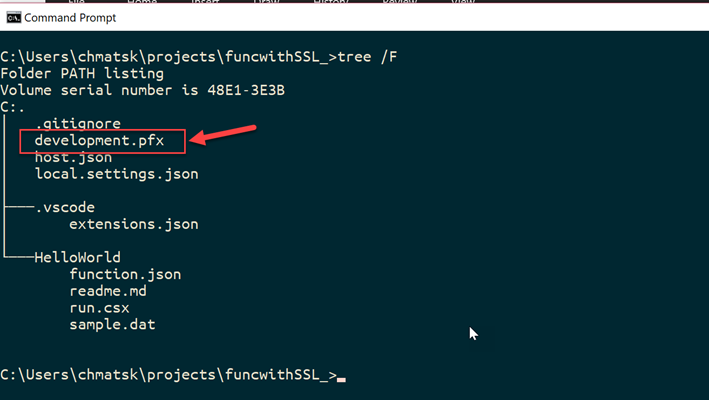
Up to this point, we proved that the Function is working as expected. The next step is to use the HTTPS capabilities of the core tools. Make sure you copy your development certificate to the root of your Function. For this example, the folder structure looks like this:
To run the function and listen to a custom port over HTTPS, we need to use the following command:
func host start --port 4034 --useHttps --cert <yourCertificate>.pfx --password <theCertificatePrivateKey>
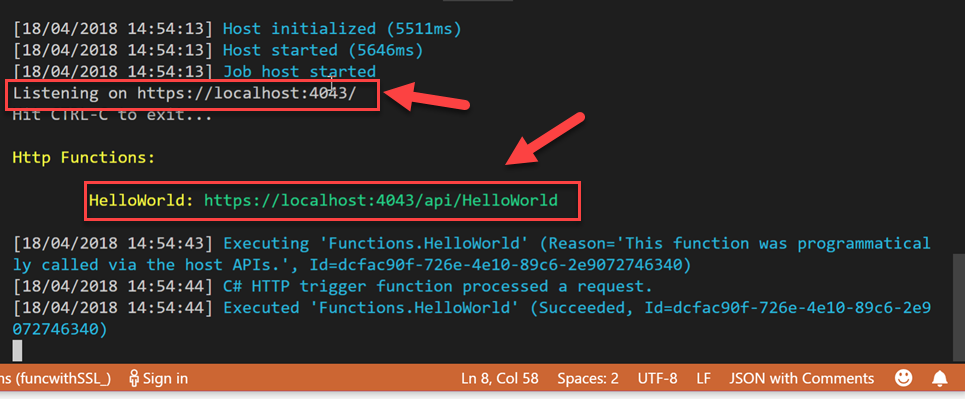
This should generate the following logs. Pay attention to the highlighted bits which indicate that we're now using an overridden port instead of the default one with the specified certificate
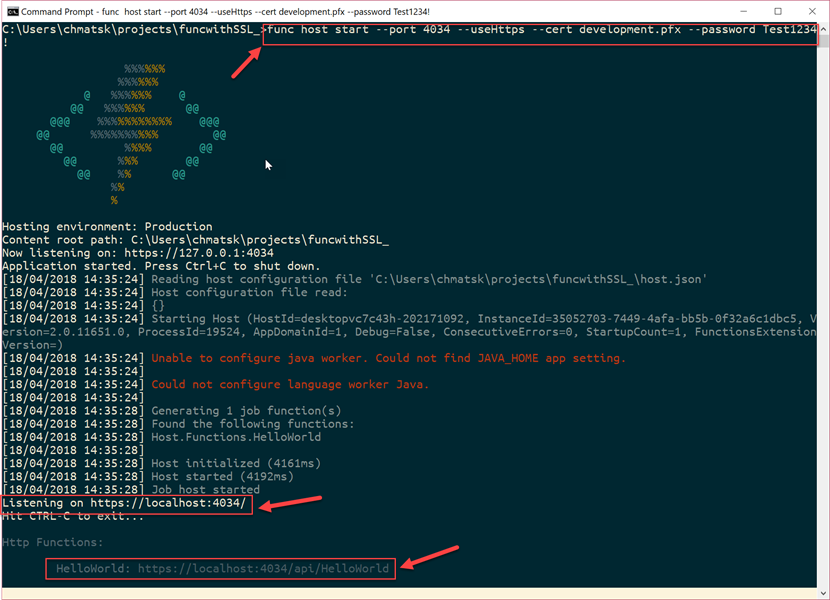
Again, we can use the preferred tool to test the function over HTTPS this time to ensure that everything is in order.
Finally, we may want to implement the same logic inside VS Code to ensure that all testing is consistent. In VS Code, open the tasks.json file and edit the command value to match the same command we used earlier. The end result should look like this:
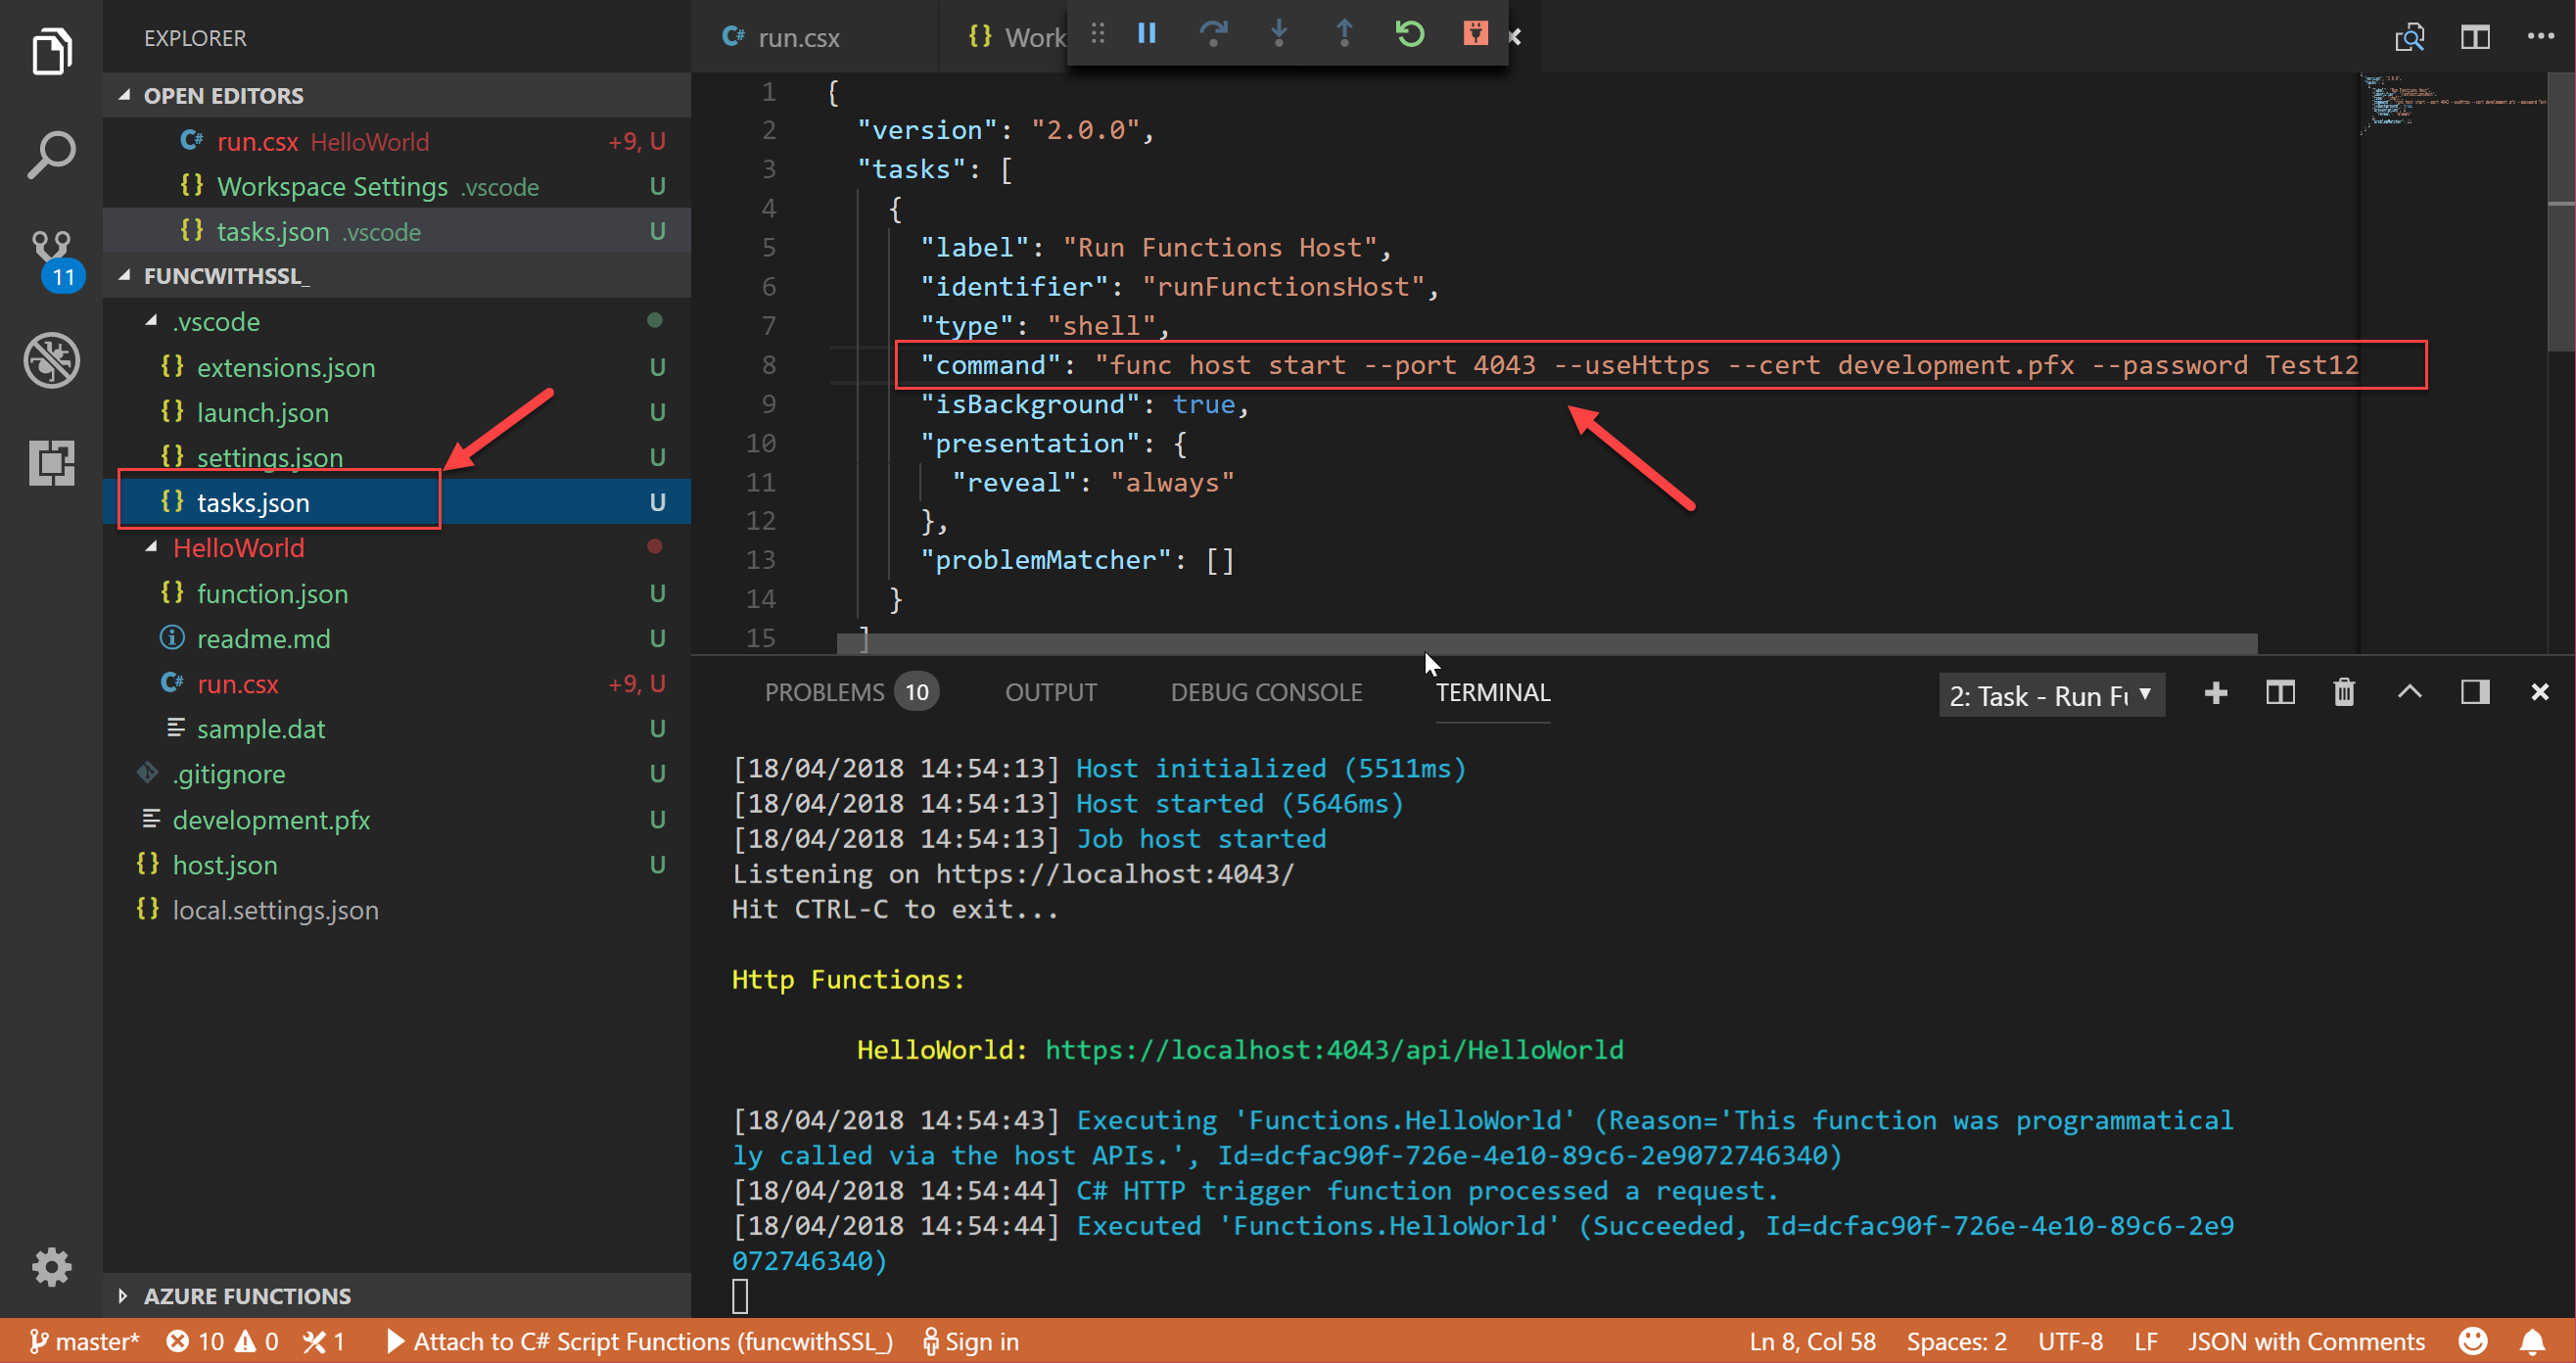
If we kick off a debug session and hit the function over the correct https URL then the following logs should appear:
We can now debug and run our Functions locally using HTTPS either using the Core Tools or VS Code. I hope you found this post as useful as I did and, as always, feel free to leave a comment if you have any questions.