

In this article we're going to learn how to make an application using AWS Serverless that lets us identify images of celebrities. We'll use AWS Rekognition for AI-based identification.
We are going to attach an event to the S3 Bucket so that whenever a file gets uploaded to the bucket, it'll invoke a Lambda function that will process the information from the image and save it to the DynamoDB table.
Before you use DynamoDB, just make sure that you check out this guide on AWS DynamoDB Pricing so you only spend what you want to spend.
Tech Spec
We are going to use Lambda functions to code our project logic and AWS Rekognition for AI-based image identification of the celebrity.
If we get valid data from the AWS Rekognition API then we are going to store that data in a DynamoDB Table.
All these resources except from the S3 bucket will be created inside the serverless.yml file.
Project Setup
We are going set up all the things we need in this project step by step. First we'll go through the serverless.yml file. To learn more about this file, check out this post. Let’s get started with the first step.
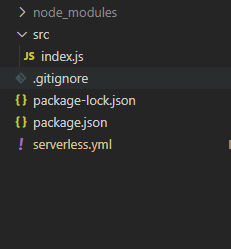
Our project folder structure should look like this at the end of this tutorial.
How to set up the serverless.yml file
We will break down the serverless.yml file into different parts to make it easier to understand.
How to set permissions and configure the project
service: meta-data-serverless

provider:
  name: aws
  runtime: nodejs12.x
  environment:
    DYNAMO_TABLE_NAME: MetaData
    BUCKET_NAME: new-bucket-caps2
  iamRoleStatements:
    - Effect: Allow
      Action:
        - dynamodb:PutItem
        - rekognition:RecognizeCelebrities
        - s3:Get*
        - s3:List*
      Resource: "*"
In this code block, we are setting different environment variables and AWS IAM permissions which will be given to our lambda functions. So for our use, we need to write an item to the DynamoDB table, use AWS Rekognition's API to do image identification on the image, and get the file from S3 (all of which we've done in the above code).
Note that you will need to create a new public S3 bucket and set the name of that bucket here in place of “new-bucket-caps2” as the BUCKET_NAME property. To read more about IAM roles check out the official AWS documentation.
How to add a lambda function
functions:
  processImg:
    handler: src/index.handler
    events:
      - s3:
          bucket: ${self:provider.environment.BUCKET_NAME}
          event: s3:ObjectCreated:*
          existing: true
In the functions block, we are defining a single lambda function which will be invoked when any file is uploaded to the S3 bucket.
As you can see, we are attaching an event to this lambda function on which it will be invoked. s3:ObjectCreated is the event when any file gets uploaded into the S3 bucket.
We are also declaring that this bucket already exists by setting the existing option to true. So make sure that you create this bucket before you deploy the project.
We are also referencing the environment variable for the bucket name which we created in the above section.
How to add DynamoDB table configuration
resources:
  Resources:
    UsersDynamoDbTable:
      Type: AWS::DynamoDB::Table
      DeletionPolicy: Retain
      Properties:
        AttributeDefinitions:
          - AttributeName: id
            AttributeType: S
        KeySchema:
          - AttributeName: id
            KeyType: HASH
        ProvisionedThroughput:
          ReadCapacityUnits: 1
          WriteCapacityUnits: 1
        TableName: ${self:provider.environment.DYNAMO_TABLE_NAME}
In this block, we are defining our DynamoDB table and its configuration. Any resource we want to create on our AWS account is defined under the resources block in the serverless.yml file. Here we are defining things like table attributes, key schema, and how much provisioned throughput capacity we want to give our table.
For the table attributes, all other attributes will be dynamically added to the table except the id. We will generate the id in the code using a module called UUID.
How to set up the lambda function
After creating the serverless.yml file, it is now time to create our lambda function which we defined inside the yml file. So let’s get started on this.
We will again see different parts of the lambda function so you can understand it better.
Imports
const AWS = require("aws-sdk");
const {
    v4: uuidv4
} = require('uuid');
const rekognition = new AWS.Rekognition();
const dynamoDb = new AWS.DynamoDB.DocumentClient();
We are importing two packages, aws-sdk and UUID, to call the APIs for DynamoDB and AWS Rekognition. We are also initializing instances of them.
Define the parameters
const Bucket = event.Records[0].s3.bucket.name;
const Name = decodeURIComponent(event.Records[0].s3.object.key.replace(/\+/g, " "));

const params = {
    Image: {
        S3Object: {
            Bucket,
            Name
        }
    }
};
When our lambda gets called by an S3 event, it receives data about the object which was uploaded to the S3 bucket. Were we are just getting that object data like the name of the Bucket it was uploaded to and the name of the file as well.
After that we are passing this data into the parameter object we will be passing to the AWS Rekognition API call.
Call the AWS Rekognition API
const celebrityData = await rekognition.recognizeCelebrities(params).promise();
if (celebrityData.CelebrityFaces && celebrityData.CelebrityFaces.length) {

    const {
        Name,
        Urls,
        KnownGender,
        Face
    } = celebrityData.CelebrityFaces[0];
    const closelyMatchedEmotion = Face.Emotions.reduce((prev, current) => (prev.Confidence > current.Confidence) ? prev : current)

    const params = {
        TableName: process.env.DYNAMO_TABLE_NAME,
        Item: {
            id: uuidv4(),
            Name,
            readMore: Urls,
            KnownGender,
            closelyMatchedEmotion
        },
        ConditionExpression: "attribute_not_exists(id)"
    };
    await dynamoDb.put(params).promise();
Finally, we are calling the AWS Rekognition API with the parameters we declared in the previous step. After we get the response from the API, we check to see if it was able to identify the celebrity or not.
If it found celebrity data, then we are fetching data like Name, Gender, Emotion in the image, and so on from the identified celebrity data.
Then we generate an id using the UUID package we imported earlier. The last thing we're doing is inserting this data into the DynamoDB table.
Note that to query this saved data with non-key attributes you will need to create an index if you don’t wish to scan the whole table. Check out this post to learn how to create a DynamoDB Global Secondary Index using AWS Serverless.
Conclusion
If you reached this point, then congratulations! You now have an application that will identify celebrity data from an image.
You can now just go to your created S3 bucket and upload any celebrity image and then wait for a couple of seconds, then check the DynamoDB table to see the results saved there.
You can enhance this application in many ways. For example you can add APIs like GET to get the data and see the data which got added to the DynamoDB table. You can also use MongoDB in place of DynamoDB. To learn more about the differences between these two check out DynamoDB Vs MongoDB.
Get the source code
Click here to get the source code for this application.
You can check out more articles like this on my site.