AWS Compute Blog
Deploying AWS Lambda layers automatically across multiple Regions
This post is written by Ben Freiberg, Solutions Architect, and Markus Ziller, Solutions Architect.
Many developers import libraries and dependencies into their AWS Lambda functions. These dependencies can be zipped and uploaded as part of the build and deployment process but it’s often easier to use Lambda layers instead.
A Lambda layer is an archive containing additional code, such as libraries or dependencies. Layers are deployed as immutable versions, and the version number increments each time you publish a new layer. When you include a layer in a function, you specify the layer version you want to use.
Lambda layers simplify and speed up the development process by providing common dependencies and reducing the deployment size of your Lambda functions. To learn more, refer to Using Lambda layers to simplify your development process.
Many customers build Lambda layers for use across multiple Regions. But maintaining up-to-date and consistent layer versions across multiple Regions is a manual process. Layers are set as private automatically but they can be shared with other AWS accounts or shared publicly. Permissions only apply to a single version of a layer. This solution automates the creation and deployment of Lambda layers across multiple Regions from a centralized pipeline.
Overview of the solution
This solution uses AWS Lambda, AWS CodeCommit, AWS CodeBuild and AWS CodePipeline.
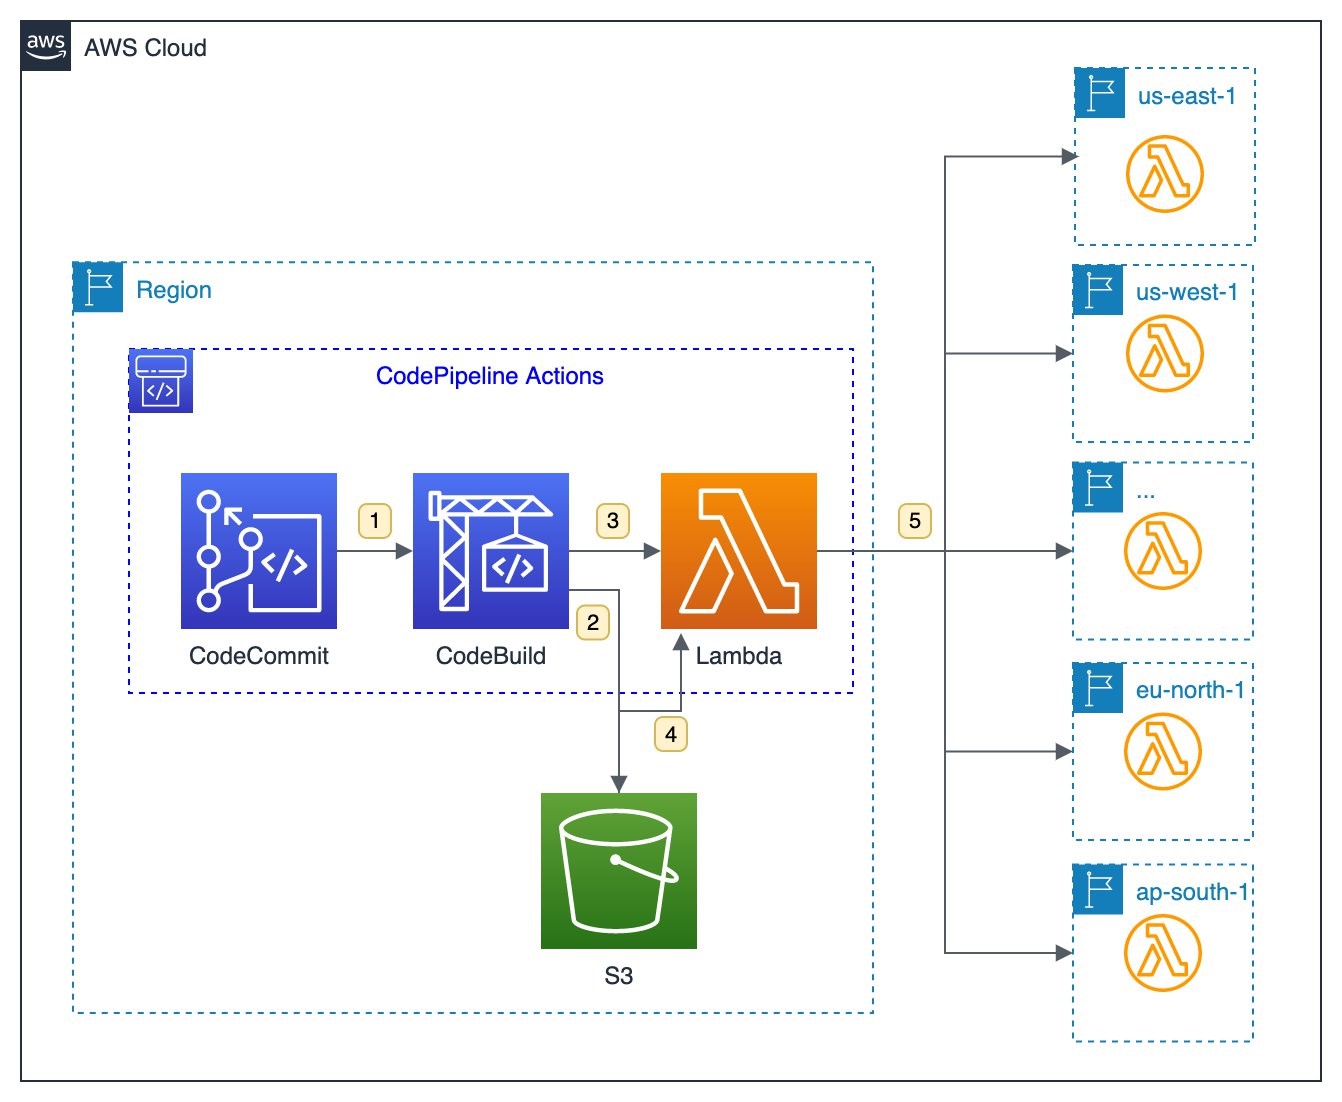
This diagram outlines the workflow implemented in this blog:
- A CodeCommit repository contains the language-specific definition of dependencies and libraries that the layer contains, such as package.json for Node.js or requirements.txt for Python. Each commit to the main branch triggers an execution of the surrounding CodePipeline.
- A CodeBuild job uses the provided buildspec.yaml to create a zipped archive containing the layer contents. CodePipeline automatically stores the output of the CodeBuild job as artifacts in a dedicated Amazon S3 bucket.
- A Lambda function is invoked for each configured Region.
- The function first downloads the zip archive from S3.
- Next, the function creates the layer version in the specified Region with the configured permissions.
Walkthrough
The following walkthrough explains the components and how the provisioning can be automated via CDK. For this walkthrough, you need:
- An AWS account.
- Installed and authenticated AWS CLI (authenticate with an IAM user or an AWS STS security token).
- Installed Node.js, TypeScript.
- Installed git.
- AWS CDK installed.
To deploy the sample stack:
- Clone the associated GitHub repository by running the following command in a local directory:
git clone https://github.com/aws-samples/multi-region-lambda-layers - Open the repository in your preferred editor and review the contents of the src and cdk folder.
- Follow the instructions in the README.md to deploy the stack.
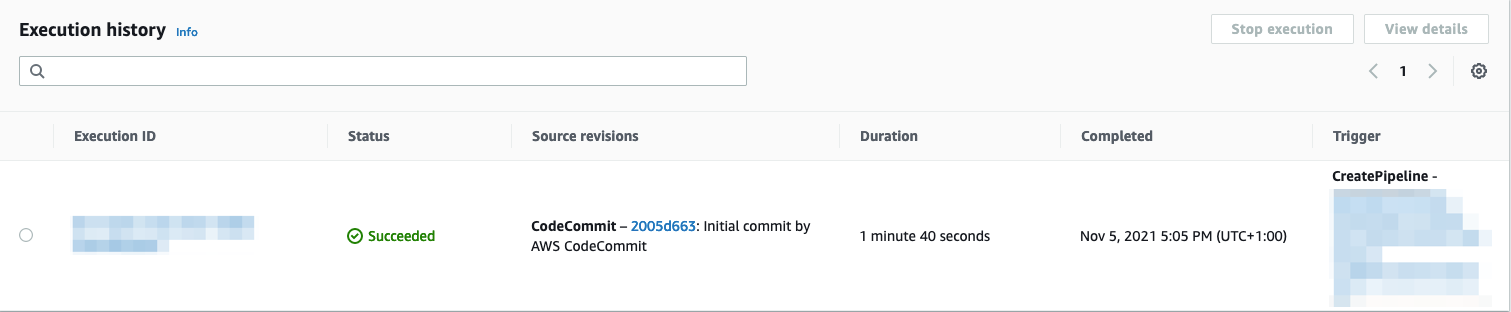
- Check the execution history of your pipeline in the AWS Management Console. The pipeline has been started once already and published a first version of the Lambda layer.

Code repository
The source code of the Lambda layers is stored in AWS CodeCommit. This is a secure, highly scalable, managed source control service that hosts private Git repositories. This example initializes a new repository as part of the CDK stack:
    const asset = new Asset(this, 'SampleAsset', {
      path: path.join(__dirname, '../../res')
    });

    const cfnRepository = new codecommit.CfnRepository(this, 'lambda-layer-source', {
      repositoryName: 'lambda-layer-source',
      repositoryDescription: 'Contains the source code for a nodejs12+14 Lambda layer.',
      code: {
        branchName: 'main',
        s3: {
          bucket: asset.s3BucketName,
          key: asset.s3ObjectKey
        }
      },
    });
This code uploads the contents of the ./cdk/res/ folder to an S3 bucket that is managed by the CDK. The CDK then initializes a new CodeCommit repository with the contents of the bucket. In this case, the repository gets initialized with the following files:
- LICENSE: A text file describing the license for this Lambda layer
- package.json: In Node.js, the package.json file is a manifest for projects. It defines dependencies, scripts, and metainformation about the project. The npm install command installs all project dependencies in a node_modules folder. This is where you define the contents of the Lambda layer.
The default package.json in the sample code defines a Lambda layer with the latest version of the AWS SDK for JavaScript:
{
    "name": "lambda-layer",
    "version": "1.0.0",
    "description": "Sample AWS Lambda layer",
    "dependencies": {
      "aws-sdk": "latest"
    }
}
To see what is included in the layer, run npm install in the ./cdk/res/ directory. This shows the files that are bundled into the Lambda layer. The contents of this folder initialize the CodeCommit repository, so delete node_modules and package-lock.json inspecting these files.

This blog post uses a new CodeCommit repository as the source but you can adapt this to other providers. CodePipeline also supports repositories on GitHub and Bitbucket. To connect to those providers, see the documentation.
CI/CD Pipeline
CodePipeline automates the process of building and distributing Lambda layers across Region for every change to the main branch of the source repository. It is a fully managed continuous delivery service that helps you automate your release pipelines for fast and reliable application and infrastructure updates. CodePipeline automates the build, test, and deploy phases of your release process every time there is a code change, based on the release model you define.
The CDK creates a pipeline in CodePipeline and configures it so that every change to the code base of the Lambda layer runs through the following three stages:
new codepipeline.Pipeline(this, 'Pipeline', {
      pipelineName: 'LambdaLayerBuilderPipeline',
      stages: [
        {
          stageName: 'Source',
          actions: [sourceAction]
        },
        {
          stageName: 'Build',
          actions: [buildAction]
        },
        {
          stageName: 'Distribute',
          actions: parallel,
        }
      ]
    });
Source
The source phase is the first phase of every run of the pipeline. It is typically triggered by a new commit to the main branch of the source repository. You can also start the source phase manually with the following AWS CLI command:
aws codepipeline start-pipeline-execution --name LambdaLayerBuilderPipelineWhen started manually, the current head of the main branch is used. Otherwise CodePipeline checks out the code in the revision of the commit that triggered the pipeline execution.
CodePipeline stores the code locally and uses it as an output artifact of the Source stage. Stages use input and output artifacts that are stored in the Amazon S3 artifact bucket you chose when you created the pipeline. CodePipeline zips and transfers the files for input or output artifacts as appropriate for the action type in the stage.
Build
In the second phase of the pipeline, CodePipeline installs all dependencies and packages according to the specs of the targeted Lambda runtime. CodeBuild is a fully managed build service in the cloud. It reduces the need to provision, manage, and scale your own build servers. It provides prepackaged build environments for popular programming languages and build tools like npm for Node.js.
In CodeBuild, you use build specifications (buildspecs) to define what commands need to run to build your application. Here, it runs commands in a provisioned Docker image with Amazon Linux 2 to do the following:
- Create the folder structure expected by Lambda Layer.
- Run npm install to install all Node.js dependencies.
- Package the code into a layer.zip file and define layer.zip as output of the Build stage.
The following CDK code highlights the specifications of the CodeBuild project.
const buildAction = new codebuild.PipelineProject(this, 'lambda-layer-builder', {
      buildSpec: codebuild.BuildSpec.fromObject({
        version: '0.2',
        phases: {
          install: {
            commands: [
              'mkdir -p node_layer/nodejs',
              'cp package.json ./node_layer/nodejs/package.json',
              'cd ./node_layer/nodejs',
              'npm install',
            ]
          },
          build: {
            commands: [
              'rm package-lock.json',
              'cd ..',
              'zip ../layer.zip * -r',
            ]
          }
        },
        artifacts: {
          files: [
            'layer.zip',
          ]
        }
      }),
      environment: {
        buildImage: codebuild.LinuxBuildImage.STANDARD_5_0
      }
    })
Distribute
In the final stage, Lambda uses layer.zip to create and publish a Lambda layer across multiple Regions. The sample code defines four Regions as targets for the distribution process:
regionCodesToDistribute: ['eu-central-1', 'eu-west-1', 'us-west-1', 'us-east-1']The Distribution phase consists of n (one per Region) parallel invocations of the same Lambda function, each with userParameter.region set to the respective Region. This is defined in the CDK stack:
const parallel = props.regionCodesToDistribute.map((region) => new codepipelineActions.LambdaInvokeAction({
      actionName: `distribute-${region}`,
      lambda: distributor,
      inputs: [buildOutput],
      userParameters: { region, layerPrincipal: props.layerPrincipal }
}));
Each Lambda function runs the following code to publish a new Lambda layer in each Region:
// Simplified code for brevity
// Omitted error handling, permission management and logging
// See code samples for full code.
export async function handler(event: any) {
    // #1 Get job specific parameters (e.g. target region)
    const { location } = event['CodePipeline.job'].data.inputArtifacts[0];
    const { region, layerPrincipal } = JSON.parse(event["CodePipeline.job"].data.actionConfiguration.configuration.UserParameters);

    // #2 Get location of layer.zip and download it locally
    const layerZip = s3.getObject(/* Input artifact location*/);
    const lambda = new Lambda({ region });
    // #3 Publish a new Lambda layer version based on layer.zip
    const layer = lambda.publishLayerVersion({
        Content: {
            ZipFile: layerZip.Body
        },
        LayerName: 'sample-layer',
        CompatibleRuntimes: ['nodejs12.x', 'nodejs14.x']
    })

    // #4 Report the status of the operation back to CodePipeline
    return codepipeline.putJobSuccessResult(..);
}
After each Lambda function completes successfully, the pipeline ends. In a production application, you likely would have additional steps after publishing. For example, it may send notifications via Amazon SNS. To learn more about other possible integrations, read Working with pipeline in CodePipeline.

Testing the workflow
With this automation, you can release a new version of the Lambda layer by changing package.json in the source repository.
Add the AWS X-Ray SDK for Node.js as a dependency to your project, by making the following changes to package.json and committing the new version to your main branch:
{
    "name": "lambda-layer",
    "version": "1.0.0",
    "description": "Sample AWS Lambda layer",
    "dependencies": {
        "aws-sdk": "latest",
        "aws-xray-sdk": "latest"
    }
}
After committing the new version to the repository, the pipeline is triggered again. After a while, you see that an updated version of the Lambda layer is published to all Regions:

Cleaning up
Many services in this blog post are available in the AWS Free Tier. However, using this solution may incur cost and you should tear down the stack if you don’t need it anymore. Cleaning up steps are included in the readme in the repository.
Conclusion
This blog post shows how to create a centralized pipeline to build and distribute Lambda layers consistently across multiple Regions. The pipeline is configurable and allows you to adapt the Regions and permissions according to your use-case.
For more serverless learning resources, visit Serverless Land.